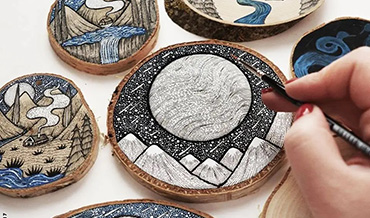
How To Paint Unfinished Wood Crafts Ultimate Guide
18/03/2022 | Benjamin Drake
You have just purchased a blank wooden piece from a arts and craft store so that you can paint out your heart. You could start painting it right away, or you could apply a few moments of your time to these steps to give your painting a more sophisticated and durable finish.
The first step is sanding the wooden piece to remove all the ridges and rough patches. You can then prime your wood to glue your final paint more strongly onto your wood. The last step is coating your wood with a sealer to help it endure dust, UV rays and prevent Yellowing from making it more durable.
The following are some of the methods of painting unfinished wood crafts
1. Preparing the wood
Utilizing 140 to 180-grit sandpaper, you should sand the surface of the object. You can use a sanding sponge rather than sandpaper, even though it works better for curved surfaces. The most crucial tip of sanding a wooden piece is to go along the wood grains rather than across it.
You can skip this if the wooden piece you possess has been filed before the purchase. It can be checked by moving the hand across the wood to see if it’s smooth. You can wipe the dust away using any rough tack cloth. Tack cloth is a uniquely sticky cloth mainly intended for this.
You can find it in any hardware store. The alternative for a tack cloth is any damp cloth. You must carry out this step even if you didn’t have to sand your wooden piece since wooden pieces can be dusty and prevent your primer or paint from sticking to your wooden work.
You can then apply a primer by a brush or spray it, depending on the type of primer you possess. The step is called sealing the wood and helps to set your paint better onto the wooden medium.
Another advantage of this step is that it allows even the lighter shades of color to be more vibrant than painted directly.
The sides and the medium’s front should be primed first and allowed to dry before priming the medium’s backside fully. After the primer is completely dried, you can sand the first layer of primer to get a smoother finish. After wiping it clean, repeat the process a few times until no more ridges remain.
2. Painting and Sealing the Wood
Select the color you want for the background and pour a small amount onto your color palette. Pour each color one at a time to prevent the colors from drying. Acrylic paint comes in two types: the first is the cheap craft-grade quality available in bulk, while the second is an expensive high-quality used by artists available in tubes.
The high-quality acrylic paints need to be diluted with a few drops of water to get a creamy consistency. Then, you apply a layer of this paint onto your wooden medium utilizing a foam brush or a broad, flat paintbrush. After allowing the coat to dry, you have to recoat the layer and allow it to dry again. The front and the sides should be painted and dried first before painting the backside.
Dip the brush in water often to keep the paint wet, even if you are using one color. If you are working with multiple colors, keep a cup of water nearby. Rinse the brush with water before switching to a new color. Sealers appear in various finishes, including matte, glossy, and satin; You can choose the one you want and apply a thin layer.
Instead of employing camel hair or stiff bristle brushes, you should go for the talon, katakana, or sable ones. Don’t overload the brush with paint. The paint should come no more than halfway up the bristles. It is time to give your wooden piece a touch of your design and details. You can use stencils or trace design along with hand designs as well onto the wooden piece.
You can even use a light coat of spray-on or brush-on sealer, then let it dry. Apply a second coat, if needed, and let that one dry too. If you are using the brush-on kind, apply it using a broad foam brush. If you are using a spray-on varnish, be sure to work in a well-ventilated area.
